Configure the Lineage Chart
Alation Cloud Service Applies to Alation Cloud Service instances of Alation
Customer Managed Applies to customer-managed instances of Alation
Important
You are viewing documentation for Alation’s Classic User Experience.
Exclude Schemas From Lineage Charts Globally
Available from version 2024.3.5
As a Catalog Admin or Server Admin, you can exclude specific schemas from the Compound Layout view of lineage charts globally through lineage settings in Admin Settings. Tables and views from the schemas that have been excluded via lineage settings won’t appear in any lineage charts.
Note
Users interacting with lineage charts also have the ability to exclude schemas from the chart to adjust the number of lineage nodes to be displayed. See more in Exclude Schemas. Unlike that filtering by users, this global filter will apply to all charts.
Select Schemas to Exclude
To exclude schemas globally:
Click the gear icon in the top right corner of the page. The Admin Settings page will open.

In the search bar on top of the Admin Settings page, search for Lineage Settings. Alternatively, locate the Lineage Settings tile under Platform Settings. Click Lineage Settings to open that page.
Click the Settings icon (the three gears) in the top right corner of the page.

Catalog Admins: A dropdown menu appears. Click Customize Catalog.
Server Admins: The Admin Settings page appears. Under the Catalog Admin section, click Customize Catalog.
The Customize Catalog page appears. Click the Lineage tab to open Lineage Settings.
Click the Default Filters sub-tab to open it.
Click the Search icon at the far right of the Select Schemas To Exclude (Compound layout) field to open a list of data sources relevant to the current chart.
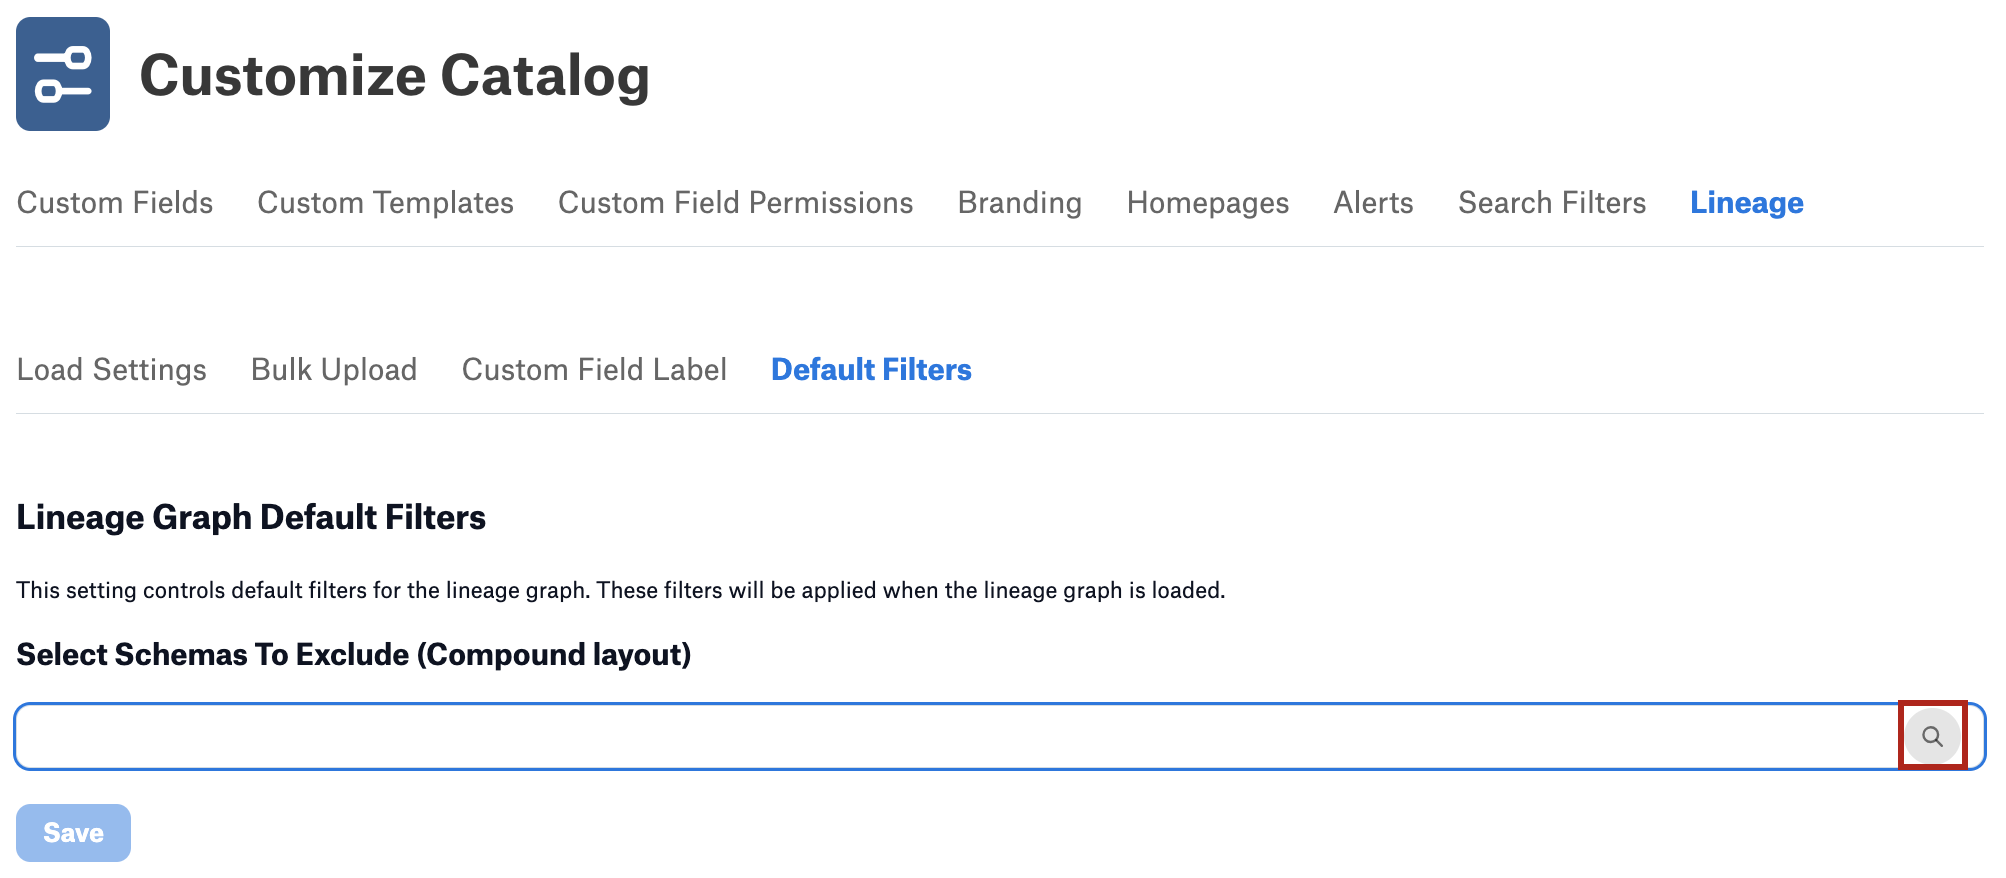
Important
Make sure to click on the Search icon exactly and not on the field. Clicking on the field won’t work.
Use the search bar under Select Data Sources to find a specific data source.
Select a data source to view its associated schemas. You can change the data source later using the dropdown menu.
After selecting a data source, you will see a list of schemas in this data source that are relevant to this lineage chart. Choose one or more schemas to exclude from the lineage chart by selecting the corresponding checkboxes. Select the Select All check box to select all schemas in this data source.
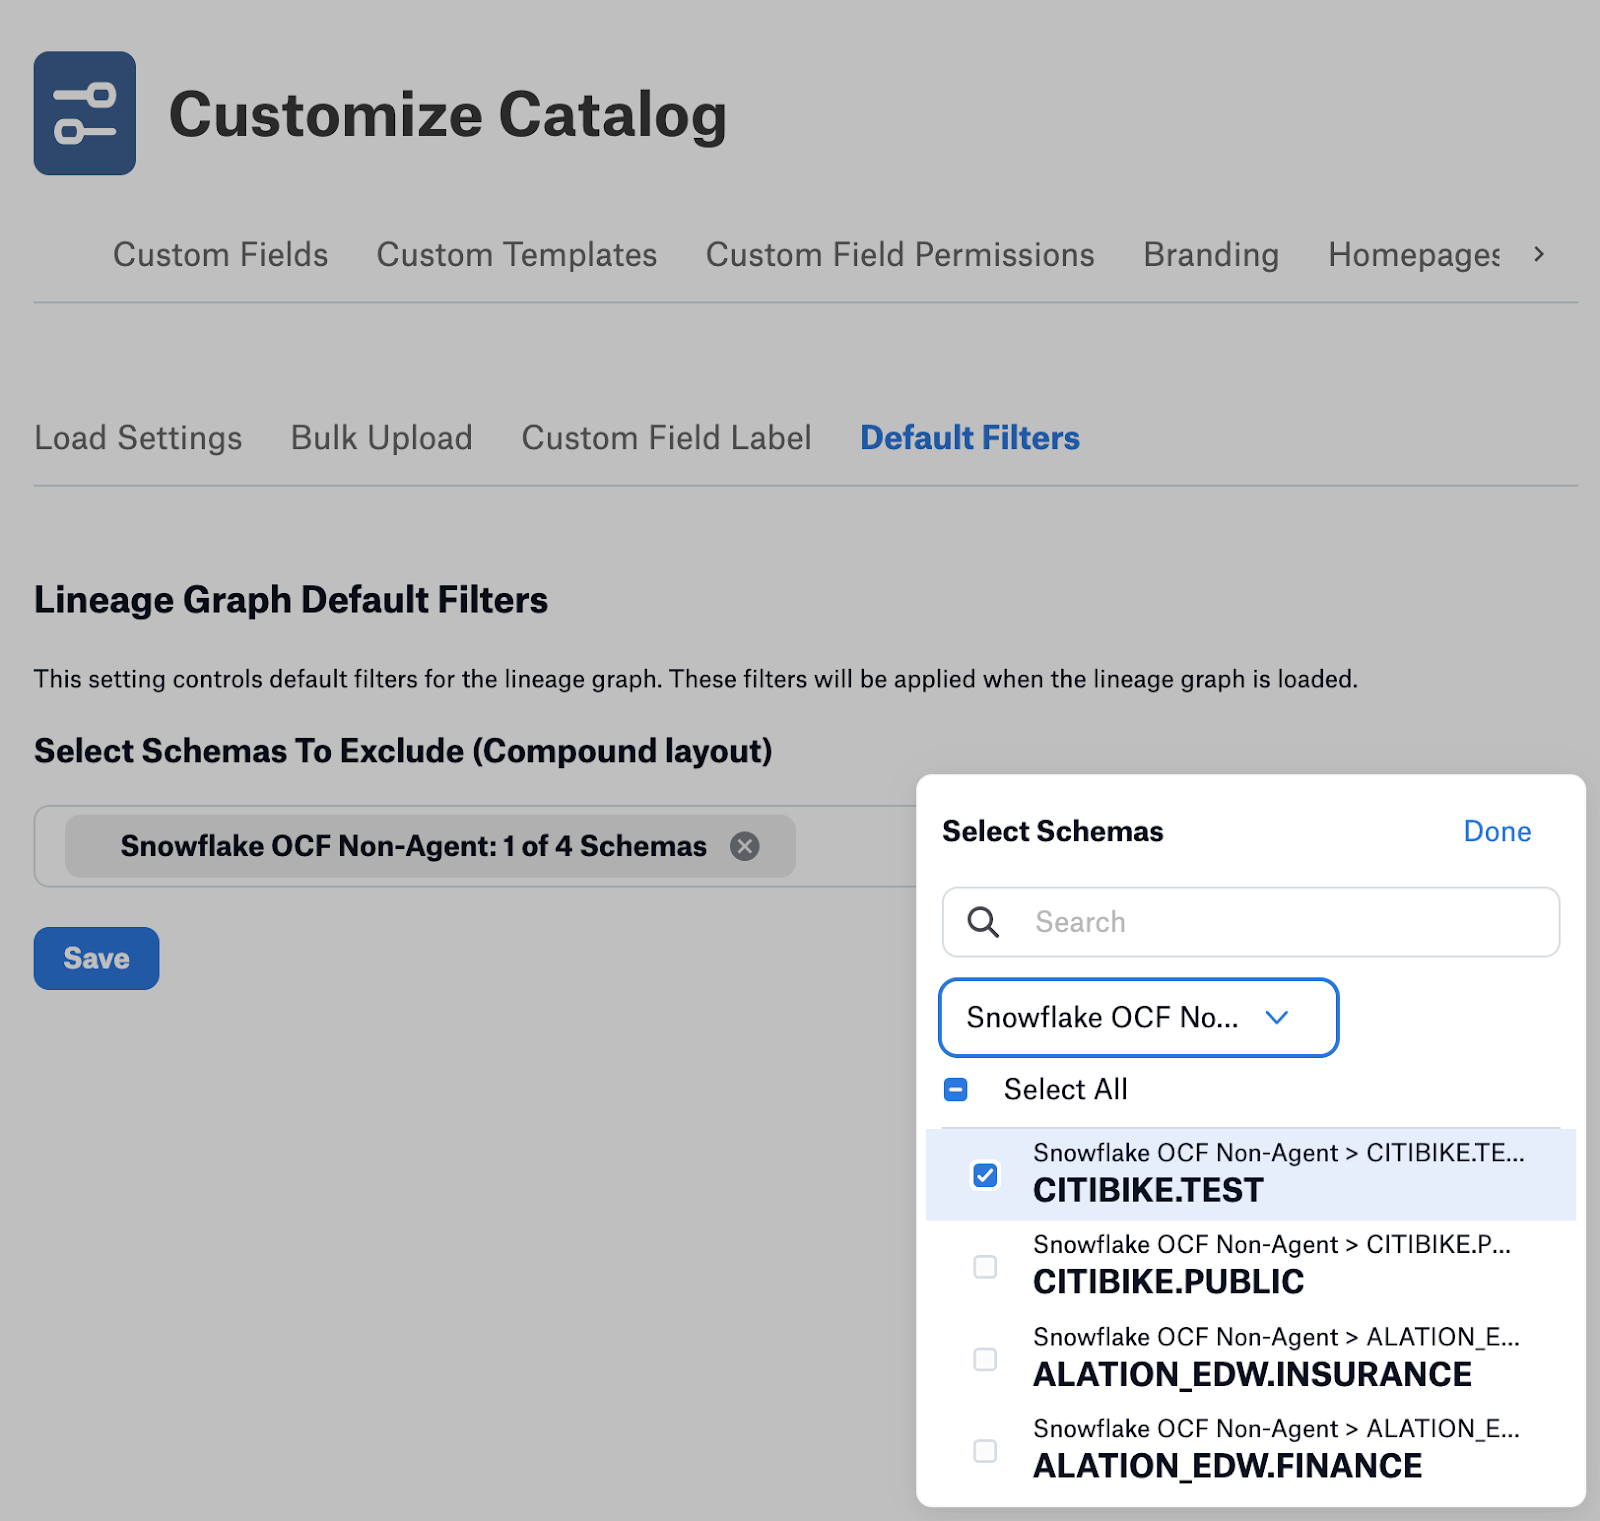
You can select multiple schemas across different data sources. To select more schemas from a different data source, change the data source in the data source dropdown list and select more schemas.
Click Done on top right of the Select Schemas widget to apply your selection of schemas. The information about selected schemas appears in the Select Schemas To Exclude (Compound layout) field, displaying the number of selected schemas per data source.
Click Save under the field to apply the configuration.
Update the Exclude Schemas Filter
To update an existing Select Schemas To Exclude default filter:
Remove All Schemas for a Data Source
Click the delete icon (X) for schemas in the Select Schemas To Exclude (Compound layout) field to deselect all schemas for a data source.
Click Save.
Remove or Add Specific Schemas
Click the search icon under Select Schemas To Exclude (Compound layout) to open the list of data sources.
Select a data source.
Select or deselect schemas in this data source by selecting the corresponding checkboxes.
Click Done on top right of the Select Schemas widget to update your selection of schemas.
Click Save under the field to apply the updated schema filter to the chart.
Schema Filter and Schema Access Permissions (Beta)
Alation Cloud Service on the cloud-native architecture
Applies from Backend version 2024.3.5
Starting in version 2024.3.5, your Data Source Admins can set up specific access permissions on schemas. The permissions can be quite restrictive: certain objects can only be accessible by specific users and inaccessible by most users. This feature is beta and disabled by default. It requires server configuration to be enabled. Find more information in Data Source Privacy Settings.
Currently, restricted permissions on schemas don’t have an impact on your ability to exclude schemas from lineage charts.
Configure Incremental Loading
When lineage charts are set to load incrementally, you can configure how many nodes are displayed at a time by adjusting the depth or the number of initial vertical nodes. The initial vertical nodes setting controls how many nodes are shown when a user first expands the lineage chart.
To configure the depth of the vertical nodes in a chart, follow these steps:
Click the Admin Settings icon in the top right corner.
On the Admin Settings page, search for Lineage Settings or locate this tile under Platform Settings. Click Lineage Settings to open the page.
The next action depends on your Alation role:
Server Admins: The Admin Settings page opens. Under the Catalog Admin section, click Customize Catalog.
Catalog Admins: A drop-down menu opens. Click the Customize Catalog option.
On the Customize Catalog page, click the Lineage tab.
Locate the Initial Vertical Nodes (Depth) section.
Use the plus and minus buttons to set the number of nodes to be revealed incrementally when a user expands the lineage chart. Any additional nodes will be hidden behind the Show More button on the lineage chart and can be added manually one by one.
Click Save.