Document Hub Basics
Alation Cloud Service Applies to Alation Cloud Service instances of Alation
Customer Managed Applies to customer-managed instances of Alation
Enabled by default from Alation version 2025.3
In General Availability from Alation version 2024.3.2
In Public Preview from Alation version 2024.1 to 2024.3.1
Important
You are viewing documentation for Alation’s Classic User Experience.
Document Hubs are Alation’s new feature set for creating custom types of documentation. Included within Document Hubs is the Glossary Hub, which is the default hub for managing business term definitions.
Document Hubs will eventually replace articles. Until you are fully ready to transition to Document Hubs, articles remain in the catalog. However, articles are only visible in the Classic User Experience. Document Hubs are available in both the New User Experience and the Classic User Experience.
Where Are Articles
When you’re in the New User Experience, articles aren’t findable through the main menu. You can use Alation’s search to find them. All links to articles will open the article in the Classic User Experience.
When you’re in the Classic User Experience, find articles through the left-side navigation and search.
Note
Alation offers an in-product migration solution to help you transition from Articles to Document Hubs. See Migrate Articles to Document Hubs for more information.
Document Hub Overview
With Document Hubs, you can create your own documentation types—whatever you need for your company. You can create multiple document hubs for different purposes. For instance, you might have a hub for policies and procedures, one for technical documentation, and one for business terms.
Document Hubs come with a built-in, customizable Glossary Hub for your business term definitions. If you’ve already been using the existing Glossaries and Terms feature, it will automatically become part of Document Hubs. See the Documentation topic for more about how Document Hubs are related to Glossaries and Terms.
Each document hub appears as a top level item in the catalog’s left navigation menu. You can also use document hubs to filter Alation’s search results.
The following sections describe the main features of Document Hubs:
For administrators:
Document Hub Basics
Hierarchical Structure
In 2024.3.2 and newer, you can nest folders and documents in Document Hubs. Folders can have subfolders, and documents can have subdocuments. A folder can contain both documents and subfolders.
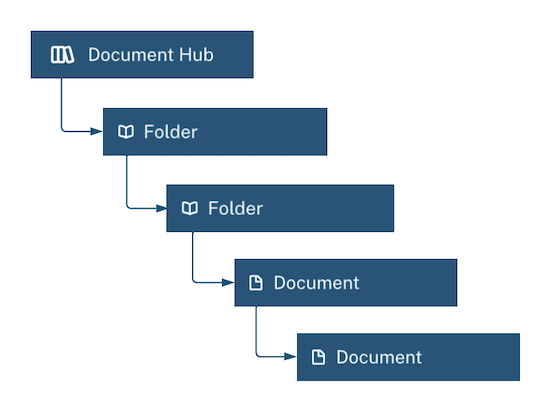
A document must have a single parent folder. Documents can inherit permissions, domains, and workflows from their parent folder only. Documents may also have navigation links, which link the document to other folders within a document hub.
The top level of the document hub itself can also contain documents directly. This is discouraged as it makes the documents less discoverable and prevents them from inheriting permissions, domains, and workflows from a parent folder.
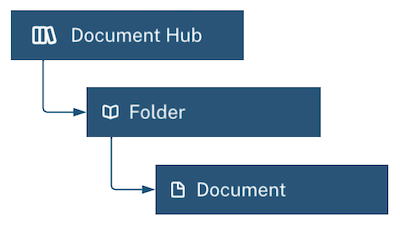
In 2024.1 to 2024.3.1, Document Hubs had a simple three-layer structure:
Hubs are the top-level containers. Document hubs are made up of documents and folders.
Beneath hubs are folders. Folders contain documents.
Documents hold your written content.
Manage Documents through Folders
Folders help you manage the documents they contain. You can manage permissions, domains, and workflows on the folder level and enable documents to inherit the folder settings. You can also manage these things on the document level if desired.
Custom Names
Alation admins can customize the generic names document hub, folder, or document. You might still see the generic names sometimes, like:
When the admin hasn’t customized the names
When document hub objects are referred to outside the context of a given hub
Admins can’t change the icons associated with these objects. You can use the icons shown above to tell whether something is a document hub, folder, or document.
Permissions
By default, everyone can see folders and documents, but admins can restrict access if needed. If you don’t have permission to view a folder or document, you won’t be able to see it anywhere in the Alation catalog. See Document Hub Permissions for more details.
Mentions
Like other catalog objects, documents and folders can be @-mentioned in text fields throughout the catalog, enabling you to link to relevant documentation.
You can also @-mention other catalog objects within the description or other rich text fields in documents and folders. Starting in 2024.1.3, when a catalog object’s template has the Mentions field, it will list all documents and folders that @-mention the object. This makes it easier to find relevant information.
Trust Flags
Starting with release 2025.1.1, Document Hubs support trust flags for documents and folders. Trust flags are a way to indicate the reliability or quality of a document or folder. When you add a Deprecation flag to a document or folder, all its children will be deprecated, too. See Use Trust Flags for more information.
Search Document Hubs with Filters
Available in the New User Experience
Available in the Classic User Experience from 2023.3.5
In Alation’s search, you can filter the results by Document Hub object types, folders, or templates.
Filter by Document Hub Object Types
You can filter search results by Document Hub object types to show:
All documents and folders in the catalog
All documents and folders in one or more hubs
All folders in one or more hubs
All documents in one or more hubs
To filter search results by Document Hub object type:
Click on the search box, then click Search Alation, or enter a search term and click See all results.
Look for the Filters panel on the left. If it’s not visible, click the Filters button to open it.
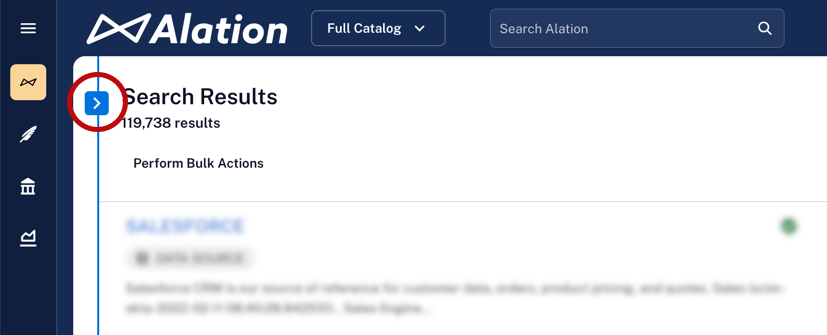
Expand the Object Type menu on the left. Click on one of the options below to filter to:
Select the checkbox next to Documentation. This will filter the search results to all folders and documents in all document hubs.
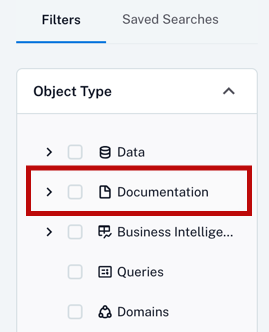
Click the arrow next to Documentation. Select the checkbox next to a specific document hub. This will filter to all the folders and documents in that hub. You can select multiple hubs.
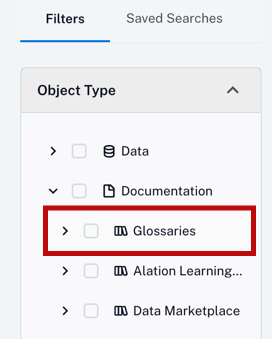
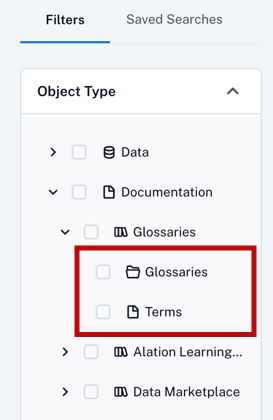
Click the arrow next to Documentation, then click the arrow next to a document hub. Select the checkbox next to <Folders> or <Documents> for that hub. The label name depends on the custom name chosen by admins. You can make multiple selections.
Click on the search box, then click Search Alation, or enter a search term and click See all results.
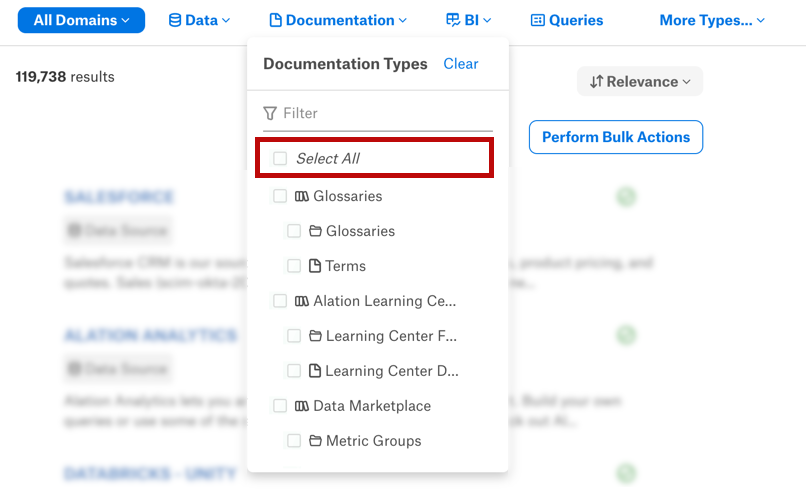
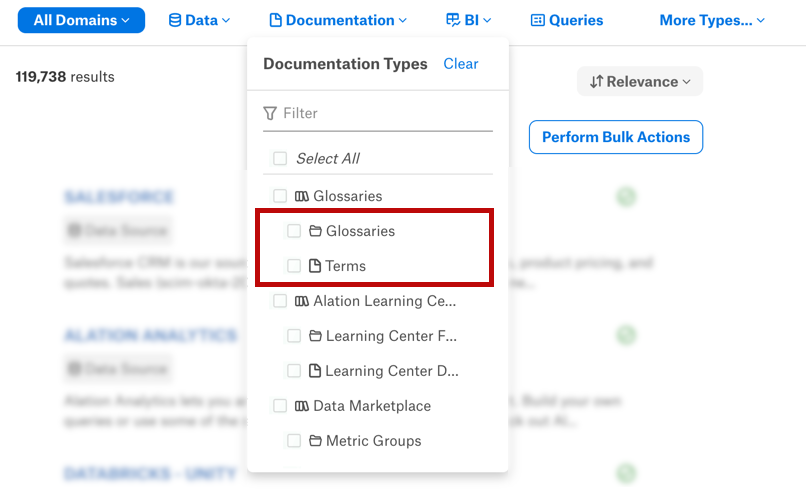
Click Documentation from the list of filters at the top. Click on one of the options below to filter to:
Select the checkbox next to Select All (if the checkbox is already selected, it will read Unselect All). This will filter the search results to all folders and documents in all document hubs.
Select the checkbox next to a specific document hub. This will filter to all the folders and documents in that hub. You can select multiple hubs.
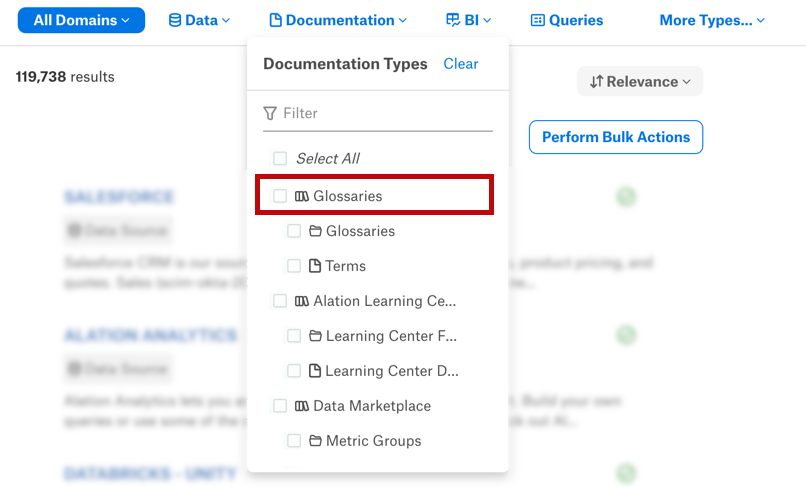
Select the checkbox next to <Folders> or <Documents> for that hub. The label name depends on the custom name chosen by admins. You can make multiple selections.
Filter by Document Folder or Template
You can filter search results by document folder or template to show:
All documents in one or more folders
All documents assigned to one or more templates
To filter search results by document folder or template:
Click on the search box, then click Search Alation, or enter a search term and click See all results.
Look for the Filters panel on the left. If it’s not visible, click the Filters button to open it.

Click on one of the options below to filter to:
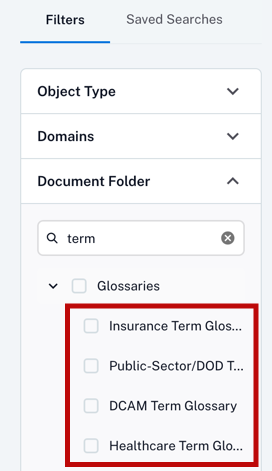
Expand the Document Folder menu on the left.
Click the arrow next to a document hub.
Select the checkbox next to a specific folder. You can select multiple folders. Use the Search Folders box to find the folder you want.
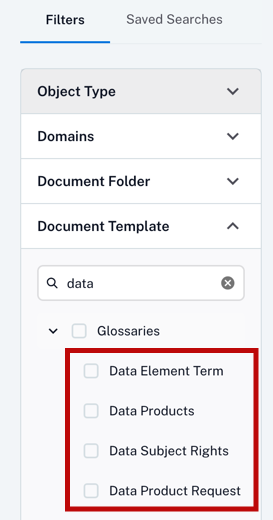
Expand the Document Folder menu on the left.
Click the arrow next to a document hub.
Select the checkbox next to a specific template. You can select multiple templates. Use the Search Folders box to find the template you want.
Click on the search box, then click Search Alation, or enter a search term and click See all results.
Look for the Filters panel on the left. If it’s not visible, click the Filters button to open it.
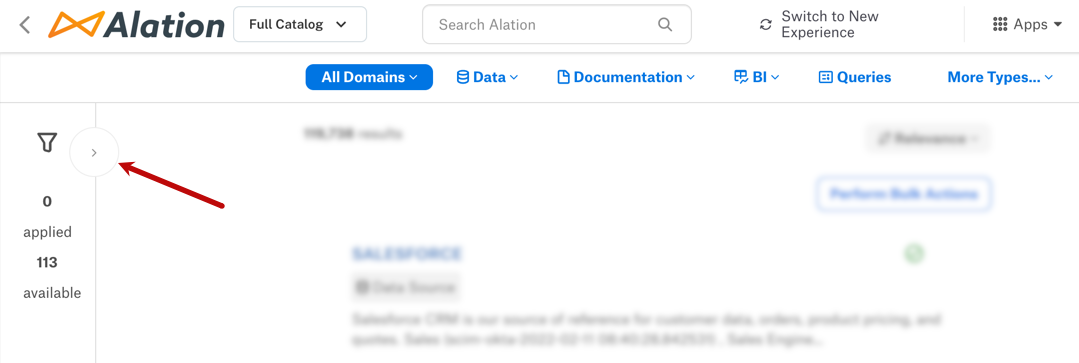
Click the See [#] More Filters button in the Filters panel on the left. The left panel expands.
Each document hub appears in the left panel with a list of its folders and templates. Scroll to find the folder or template you want to filter to. Select the checkbox next to it. You may need to click [#] More to see the full list of folders or templates for a given hub.
Here’s an example of the left filter panel with a document hub called Glossaries whose folders are called Glossaries and whose documents are called Terms.
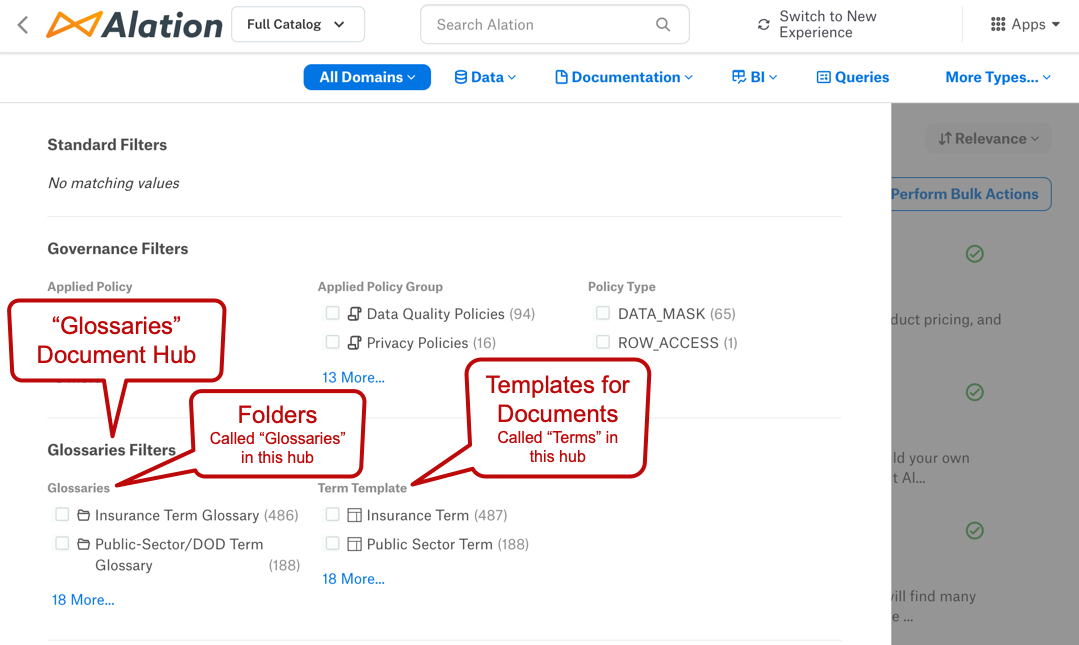
Click View Results at the bottom of the left panel to see the filtered results.
Adjust the Document Hub Table View
Document hub pages show tables of the folders and documents in the hub. Folder pages contain a table of documents (and subfolders, in 2024.3.2 and newer) in the folder. Admin users determine the default view for these tables, but individual users can override the default and customize their own view.
Add, Remove, and Rearrange Columns
Starting in 2024.1.3, you can add, remove, and rearrange the columns in a document or folder table. To do this, click the column icon next to the search box.
The Column Organization menu opens. It contains a list of all the custom and built-in fields in the available templates. The Selected section lists the columns currently shown in the table. The All Columns section at the bottom lists all available columns, including those not currently used in the table.
If the list of columns is long, use the search box at the top of the menu to find the column you’re looking for.
To add a column, select the corresponding checkbox from the All Columns section of the list.
To remove a column, clear the corresponding checkbox from the Selected section of the list. You can’t remove the title column from the table. To remove all available columns, clear the checkbox at the top of the list (it can’t be completely cleared, since you can’t remove the title column).
To change the order of the columns in the table, hover over the column name from the All Columns section of the Column Organization menu and drag it to a new place in the list.
To return to the default table view settings, click Apply Admin Settings.
To save your changes, click the Save button displayed on the Save Table View banner. Once the changes are saved, clicking Apply Admin Settings won’t revert the changes. However, you can click Reset to system settings to revert to the default settings. Only admins can reset to system settings.
To save the current view (with your changes) as the default for all tables in your current document hub, click Apply view for all Folders. For document tables, when you reset to system default settings by clicking Reset to system settings, the view reverts to the default for that document hub.
To finish adjusting the column settings, click away from the Column Organization menu.
Filter
At the top of each document or folder table is a box for searching or filtering the table. Enter a term in the box. The list of documents or folders will be filtered to show those that match the term.
In 2024.3.2 and earlier, the filter looks for matches on the title, description, and custom field values.
In 2024.3.3 and newer, the filter only returns matches on the title. Titles that match the beginning of the filter term appear at the top of the results. To find documents or folders based on the description or custom field values, use the full search instead.
Sort
By default, document and folder tables sort their contents alphabetically by title. You can reverse the sort order by clicking the title header.
View Document Counts
Available in the New User Experience
Available in the Classic User Experience from 2025.1.1
On a document hub or folder page, you can configure the folder table to show a count of documents in each folder. You can also configure the document table to show a count of how many subdocuments a document has.
To show document counts:
Click the column icon above the folder table.
The Column Organization menu opens. Select the checkboxes next to the following columns:
<Documents>: The number of documents that are direct children of the folder, including subdocuments of the direct children. Doesn’t count navigation links or documents in subfolders.
Note
The column name depends on the custom name chosen by admins.
Nav Links: The number of documents that have navigation links to the folder. Doesn’t count navigation links in subfolders.
Total: The total number of documents in the folder, including documents, subdocuments, and navigation links. Includes counts from all subfolders.
Click away from the Column Organization menu to close it.
To show subdocument counts:
Click the column icon above the document table.
The Column Organization menu opens. Select the checkbox next to Children.
Click away from the Column Organization menu to close it.
View Top-Level or All Children
Available in the New User Experience
Available in the Classic User Experience from 2025.1.1
On a document hub or folder page, you can choose whether to view just the top-level children or all children (including subfolders and their documents). By default, the table shows all children. To change this setting, click the toggle button above the table.
Enable Document Hubs
For help enabling Document Hubs, see Enable Document Hubs.
Create and Configure Document Hubs
For more about creating and configuring Document Hubs, see Manage Document Hubs.


