Get Started with Creating Data Products
Alation Cloud Service Applies to Alation Cloud Service instances of Alation
The Data Products wizard guides you through creating a data product step by step. You name and describe the product, choose what to build it from, select the assets to include, select the documentation that Data Product Chat can use, and set who can see the draft. After you click Create draft, Alation runs background enrichment jobs that generate descriptions, detect joins, and extract metrics. The product arrives populated and ready to refine.
In this topic:
Understand a Data Product’s Structure
A data product is made up of metadata that defines its structure and purpose. When you create a data product, you configure these components to give consumers the context they need to understand the underlying data and how to use it.
Some data product components are required, while others are optional. The optional components are still important, but they often require a more advanced understanding of data product design. You start by adding the required components in the wizard and then enrich the data product with the more advanced ones.
Alation provides AI assistance to help you design data products. The AI does not run inside the wizard steps. Instead, after you click Create draft, Alation runs a set of background enrichment jobs based on the assets you selected. These jobs generate:
Table and column descriptions and join paths between the selected tables.
Business context and example questions: An extended description that explains what the data product is for, along with sample questions that users might ask in the Data Product Chat.
Metric definitions extracted from the catalog.
Product details: a product name, description, and icon.
These AI-generated properties give you a starting point, which you can review and refine from the data product’s Manage page. For more information on the enrichment jobs, see Complete the Data Product Draft.
Important
You can create data products only after setting up the Marketplace. See Set Up Data Products Marketplace if you haven’t done this yet.
To create data products, you must have at least the App User role in the Data Products app. For more information on the Data Products App permissions, refer to Configure Access in the Data Product App.
Review a Quick Demo
The following walkthrough illustrates the steps to create a data product using the Data Products wizard.
Open the Data Products Wizard
Access the Data Products App, then get started in one of the following ways:
From App Navigation
Expand the left-side navigation panel.
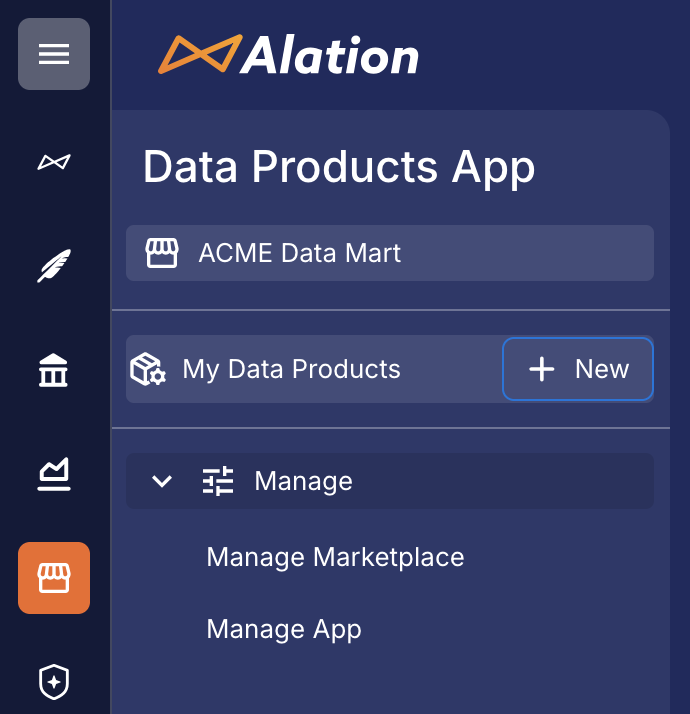
Click + New next to My Data Products. The data product wizard opens.
From Manage My Data Products
In the left-side navigation, click My Data Products. The Manage My Data Products page opens. This page lists the data products you own or manage. If you haven’t created any data products yet, this page is empty.
Click + Add New Data Product in the top-right corner. The data product wizard opens.
Follow the steps in the wizard to create a data product. The wizard has five steps: Name & describe, Asset type, Select assets, Documentation, and Visibility.
Step 1: Name and Describe Your Data Product
The first step establishes the foundation of your data product with basic information that guides the asset recommendations and AI enrichment in later steps:
In the Data product name field, enter a unique, descriptive name for your data product. The system automatically generates a URL-friendly slug from this name. Until you enter a name, the slug shows No URL slug.
In the Describe what you want to build field, describe the purpose of the data product and the primary problem-solving or analytical use case it is designed to support. Explain what business question it answers, what decisions it informs, or what type of analysis users will perform with it. Alation uses this description to recommend data assets and to draft descriptions during enrichment.
Click Continue to proceed to the next step.
Note
Click Discard to close the wizard without creating a data product. This discards all information you provided in Step 1: Name and Describe Your Data Product.
You can save progress at any point and resume later. Drafts appear in My Data Products with a draft indicator.
Step 2: Select an Asset Type
In Step 2, under What do you want to build from?, select the source type for your data product. Alation suggests specific assets from your catalog based on this choice in the next step.
You can:
Click Continue to proceed to Step 3: Select Assets.
Note
If you switch the asset type after selecting assets, a confirmation dialog warns you that changing the asset type clears your current selection.
Build from a Table or Schema
Select Table / Schema to build the data product from one or more database tables. In Step 3: Select Assets, Alation recommends tables from your catalog based on your product name and description, and you select the tables and columns to include.
Build from a BI Dashboard
Select Dashboard to start with a BI dashboard or report. The BI dashboard serves only as a starting point to discover relevant tables; it is not attached to the finished data product. In Step 3: Select Assets, you choose a BI dashboard, and Alation uses its lineage to recommend the upstream database tables that the dashboard depends on. You then review and add those tables as the product’s assets. The result is a standard table-based data product, identical in structure to one created directly from tables.
Note
When you select a BI dashboard, Alation analyzes the column-level lineage of the dashboard to trace its fields upstream to the corresponding RDBMS columns and their parent tables. This discovery process does not use AI and involves no AI model calls. The loading state that appears reflects the time the lineage lookup takes, not any generative process.
Prerequisites for BI Dashboard Table Discovery
Verify the following:
The BI source and upstream RDBMS data source are configured and have completed metadata extraction in Alation.
The BI dashboard you select must have column-level cross-source lineage connecting its fields to tables and columns in a cataloged data source. Table-level lineage alone is not sufficient.
To verify the availability of lineage, check the Lineage tab of the BI dashboard and confirm that upstream data source tables appear.
Note
Cross-source lineage between a BI source and an RDBMS data source can be established in two ways:
Automatic matching: During BI source extraction, Alation captures the database connection string from the BI source’s Connections page. If this connection string matches an already-cataloged RDBMS data source by base URL or connection host, Alation resolves the cross-source lineage automatically.
Manual configuration: Automatic matching can fail if the connection string is empty, contains SQL that Alation cannot parse, or matches multiple cataloged data sources. In these cases, configure the upstream RDBMS data source on the Lineage Settings page of the BI source settings. For details, see Configure Cross-Source Lineage.
Build from a Semantic Model
Select Semantic model to use an existing semantic model definition. When you select this option, choose one of the following ways to define the semantic model under How do you want to define this semantic model?:
BI data source: Reconstruct the semantic layer from a BI data source. In Step 3: Select Assets, Alation traces the datasets the BI data source produces and saves them with your data product.
YAML uploader: Upload a YAML file that defines the semantic model. Upload a Snowflake semantic view YAML file or a Databricks metric view YAML file. Databricks metric views are supported only through the YAML uploader.
Semantic view: Reconstruct the semantic layer from a cataloged semantic view. For information on how semantic views are cataloged, see Extract Semantic Views from Snowflake (Beta).
Note
The BI data source option uses lineage to trace the BI data source back to its underlying tables. Ensure the column-level lineage exists for the selected BI data source.
Step 3: Select Assets
In this step, select and configure the tables and columns that become part of your data product. What you see depends on the asset type you chose in Step 2: Select an Asset Type:
After you finish selecting assets, click Continue to proceed to Step 4: Configure Documentation, or click Save and exit to save the draft and resume later.
Select Tables (Table or Schema)
When you build from a table or schema, Alation displays AI-generated table recommendations based on your product name and description.
Review the recommended tables. Each recommendation shows the table name and its location in the catalog hierarchy (data source, database, and schema). Recommendations are ranked by confidence — High, Medium, or Low — to indicate how well each table matches your description. Select the checkbox for each table you want to include. After you select a table, the selected table section displays the number of columns present in the catalog for the table.
To select which columns to include, expand a table. All columns are included by default. Clear the checkbox for the column you want to exclude, or use Select all columns to include the entire list.
To add tables that aren’t recommended, click Browse catalog, search for a table, and click Add.
The wizard shows the total number of selected tables and columns at the bottom of the page.
Note
If a recommended or added table has limited metadata, the wizard displays a Low context warning. You can continue. Missing descriptions are suggested during enrichment after you create the draft.
Select Tables from a BI Dashboard
When you build from a BI dashboard, you first choose a dashboard, and Alation uses its lineage to recommend the upstream database tables that the dashboard depends on.
Click Choose a BI dashboard, or click Browse catalog to search. Search for and select a dashboard.
Review the recommended tables. Each recommendation shows the table name, catalog path, and a count of columns included.
Click Add for each table you want to include. The table moves to the Added section.
For each added table, expand the row to review and adjust the selected columns. A table with no selected columns shows a No columns selected warning; select at least one column to include it.
Note
Selecting a BI dashboard does not attach the dashboard to the data product. The tables you add from the recommendations become the product’s assets. You must add at least one table with selected columns before you can continue.
If the dashboard you select has no lineage information, or its BI tool type is not supported, Alation does not generate any table recommendations and notifies you. In that case, select a different dashboard that meets the lineage requirements.
See Prerequisites for BI Dashboard Table Discovery for the lineage requirements.
Review Your Semantic Model
The picker depends on the definition method you chose in Step 2: Select an Asset Type:
BI data source: Click Choose a BI data source to pick a source, or select one from the Recommended BI data sources for your product list. After you select a source, the wizard lists the datasets (tables) it produces, with a column count for each. Expand a table to review its columns. The datasets are saved with your data product on the next step.
Note
The list of data sources displayed under Recommended BI data sources for your product is AI-generated and may contain mistakes. We recommend you review the source before selecting it.
YAML uploader: Drag and drop a Snowflake semantic view or Databricks metric view YAML file, or click Upload YAML to browse for one. Alation resolves the tables referenced in the file against the catalog and lists the matched datasets. If one or more tables cannot be matched, a warning lists their names; the unmatched tables are skipped.
Semantic view: Perfrom the following steps to select a cataloged semantic view:
In the Review your semantic model page, click Choose a semantic view to open the Browse semantic views dialog.
Search and select the required cataloged semantic view and click Select. Each entry shows the semantic view name and its catalog location (database and schema). After you select the required semantic view, the Review your semantic model page displays the tables (datasets) present in the semantic view, with a column count for each.
Expand a table to review its columns and data types. The datasets are saved with your data product on the next step.
Step 4: Configure Documentation
Step 4 configures the Knowledge layer. It lets you include supplemental context the Data Product Chat can draw on when answering questions.
Note
You can choose to skip selecting documentation at this stage and continue to the next step. You can add it later from the data product page.
Choose any or all of the following options:
Include catalog documentation: When selected, the chat can search across Document Hubs content you have permission to access.
Folders providing context: Click Select folders to search and select the folders whose contents should be available as context during chat. You can select required folders from your Document Hubs. Documents added to a selected folder later are included automatically.
Documents providing context: Click Select documents to search and select the specific documents to include as context during chat. You can select required documents from your Document Hubs.
Click Continue to proceed to Step 5: Set Visibility.
For details on how the chat uses documentation, and how to change this configuration after the product is created, see Configure Documentation for a Data Product.
Step 5: Set Visibility
Step 5 determines who can see the draft. You can change visibility later.
Select one of the following options:
Only me (recommended): You are the only one who can see and edit the draft. No one can discover or access it until you change this.
Selected users: Only users with explicit permissions can view and edit the product. Add the users or groups who can see and edit the draft, and assign their permissions.
Note
You can change your product to public in the permission settings after your product is ready. For details on listing the product in the Marketplace, see Manage the Marketplace Listing Workflow.
After you select a visibility option, click Create draft to create the data product and start enrichment. Click Back to return to a previous step, or Save and exit to save the draft and resume later.
Complete the Data Product Draft
When you click Create draft, Alation creates the data product and immediately starts a set of background enrichment jobs. The Product created page displays the job progress.
You can choose to move away from the page while enrichment continues in the background. Click Continue to Manage page to open the data product’s Manage page, where you can watch the jobs finish.
You can also choose to cancel enrichment jobs. Click Cancel enrichment to stop the remaining jobs. If you cancel enrichment, click Preview data product to view the data product page, or click Go to Data Product to open the data product page.
Canceling enrichment stops any pending or in-progress steps. If an AI step is already running, it might finish, but Alation discards its result. You can re-run enrichment from the data product page later.
When enrichment finishes or after you cancel it, the page displays the results.
Each job displays its final status, with a Review action for completed jobs and a View error action for jobs that failed. If any steps failed or were canceled, you can re-run them from the data product page.
Note
Enrichment uses Alation Compute Units (ACUs). If your ACU pool is exhausted, you are prompted to upgrade before the jobs can run.
After enrichment finishes, review and refine the following generated content:
Table and column descriptions, joins, and metrics appear on the data product’s Data assets tab.
The business context, example questions, summary, description, and icon appear on the product’s Overview tab.
You can edit all of this from the Manage page at any time.
When the data product is created, Alation also applies the following defaults based on your account:
Contact: Your name and email become the data product’s default contact, which consumers use to request access, and your profile avatar becomes the default contact image.
Permissions: You’re automatically assigned as the Data Product Admin with full editing permissions. You can grant permissions to other users from the Permissions tab on the Manage page.
You can update the contact and permissions from the Manage page at any time.
Once your data product is ready, add more advanced configurations and list it on the Marketplace. For details, see Manage the Marketplace Listing Workflow.
Manage Drafts
Save and Exit
The Save and exit button in the wizard saves all your current progress in a Draft version of the data product.
Resume Work
To locate your drafts:
Navigate to My Data Products in the Data Products App.
In the Data Products table, locate products with the Draft state indicator.
To resume the work:
Click the Edit button next to the draft data product. The wizard reopens at the step where you left off.
Continue from where you saved the last time.
Note
Drafts created in an older version of the wizard use a different format. If you open such a draft, the wizard prompts you to discard it and start over.
Troubleshooting
Enrichment Jobs Don’t Complete
If a job fails or you cancel it, you can re-run that step from the Manage page.
If enrichment doesn’t start, retry from the Product created page, or continue to the Manage page and run enrichment from there.
Limited Metadata Warnings
If the wizard warns that a selected table has limited metadata, you can still continue. Alation suggests missing descriptions during enrichment, and you can improve the metadata after the product is created.
Slug Conflicts
The system automatically suggests alternatives if the slug derived from your product name is not unique.
Choose a more unique product name to avoid conflicts.
Draft Issues
Refresh the browser if draft data doesn’t load properly.
Clear browser cache if experiencing persistent issues.