SSO with Google BigQuery for Data Product Chat
Alation Cloud Service Applies to Alation Cloud Service instances of Alation
When using Google BigQuery as a data source for data products, the recommended authentication method for Chat and Chat Evaluation is OAuth (Open Authorization) with Google. Each user signs in with their own Google account, so Chat returns only data they are authorized to access in BigQuery.
This topic explains how to configure OAuth-based SSO authentication for BigQuery-backed data products in Alation:
Prerequisites
Permissions:
Alation: You must have the Server Admin role.
Google Cloud: You must have permission to create OAuth clients and assign Identity and Access Management (IAM) roles in the Google Cloud project that hosts the BigQuery datasets in your data product.
Data Source: A Google BigQuery data source must already be cataloged in Alation. For information on adding BigQuery data sources, see Google BigQuery OCF Connector.
Network: Ensure the Alation instance can communicate with Google OAuth endpoints.
Step 2: Configure Google OAuth for Data Products
Use this approach to register Alation as an OAuth client application in Google Cloud Platform for data product authentication.
1. Create an OAuth Client in Google Cloud Platform
To create an OAuth client for data product Chat:
Log in to Google Cloud Console and select the project that contains your BigQuery datasets.
In the left-hand menu, select APIs & Services > Credentials.

Click Create Credentials and select OAuth client ID.
Select Web Application in the Application type dropdown list.
Specify a name, for example
Alation BigQuery Data Products OAuth.Under Authorized redirect URIs, click ADD URI and enter the data product callback URL:
https://<alation_base_URL>/api/v2/auth/callback
Replace
<alation_base_URL>with the base URL of your Alation instance. Do not include a trailing slash.
Click Save and copy the Client ID and Client secret. You will need them when you create the authentication profile in Alation.
Note
For detailed information on OAuth support in Google BigQuery, see the Google Cloud documentation on OAuth 2.0.
2. Collect Authentication Information
From the OAuth client you created, collect the following information for Alation:
Client ID and Client Secret
Copy the Client ID and Client secret from the OAuth client in Google Cloud Platform.
Step 3: Create an Authentication Profile
To link the Google OAuth client to a data product, create an external authentication profile in Alation:
Click the gear icon in the top-right corner to open Admin Settings.
Select Authentication.
Locate Authentication Configuration Methods for External Systems.
From See configurations for, select Alation Cloud Service.
Click Add Configuration and select OAuth.
Populate the fields and click Save.
Refresh the page and record the Config Name for the profile you created.
OAuth Fields Reference
Note
Provide optional values if they are present in and enforced by your Google OAuth client configuration.
Field |
Description |
|---|---|
Config Name |
The profile identifier (≤ |
Client ID and Client Secret |
Use the client ID and client secret from the OAuth client you created in Google Cloud Platform. |
Scope (optional) |
Use the following values, separated by a space:
Do not use |
Subject (optional) |
Token claim used as the username. Use |
Token validity buffer (optional) |
Buffer time in minutes before token expiration (Default: |
Grant Type |
|
PKCE Verifier (optional) |
Enable or disable Proof Key for Code Exchange (PKCE) in the authentication flow. Enable if your Google OAuth client supports PKCE. |
Authorize Endpoint URL |
To request refresh tokens, use:
|
Redirect URL |
A valid redirect URL for Google OAuth. It must match the authorized redirect URI in your OAuth client and end with |
Token Endpoint URL |
|
User Info Endpoint URL |
|
Note
Learn more about external authentication profiles in Authentication Configuration Methods for External Systems.
Step 4: Assign User Permissions in BigQuery
For all Alation users connecting to the data product Chat, ensure that their Google accounts have access to the BigQuery project, datasets, and tables included in the data product.
Required BigQuery Permissions
At minimum, users typically require the following roles on the relevant BigQuery project:
BigQuery Data Viewer— to read table data.BigQuery Job User— to run queries.
Insufficient permissions result in query errors when Chat attempts to read the underlying datasets.
For the full list of permissions used by the Google BigQuery OCF connector, see the Grant Required Permissions section in Prerequisites.
Step 5: Configure SSO Authentication for the Data Product
To enable SSO authentication for Chat with a BigQuery data product:
Navigate to Data Products App from the left-side navigation.
Select My Data Products.
Locate the data product to configure.
Choose one of the following paths:
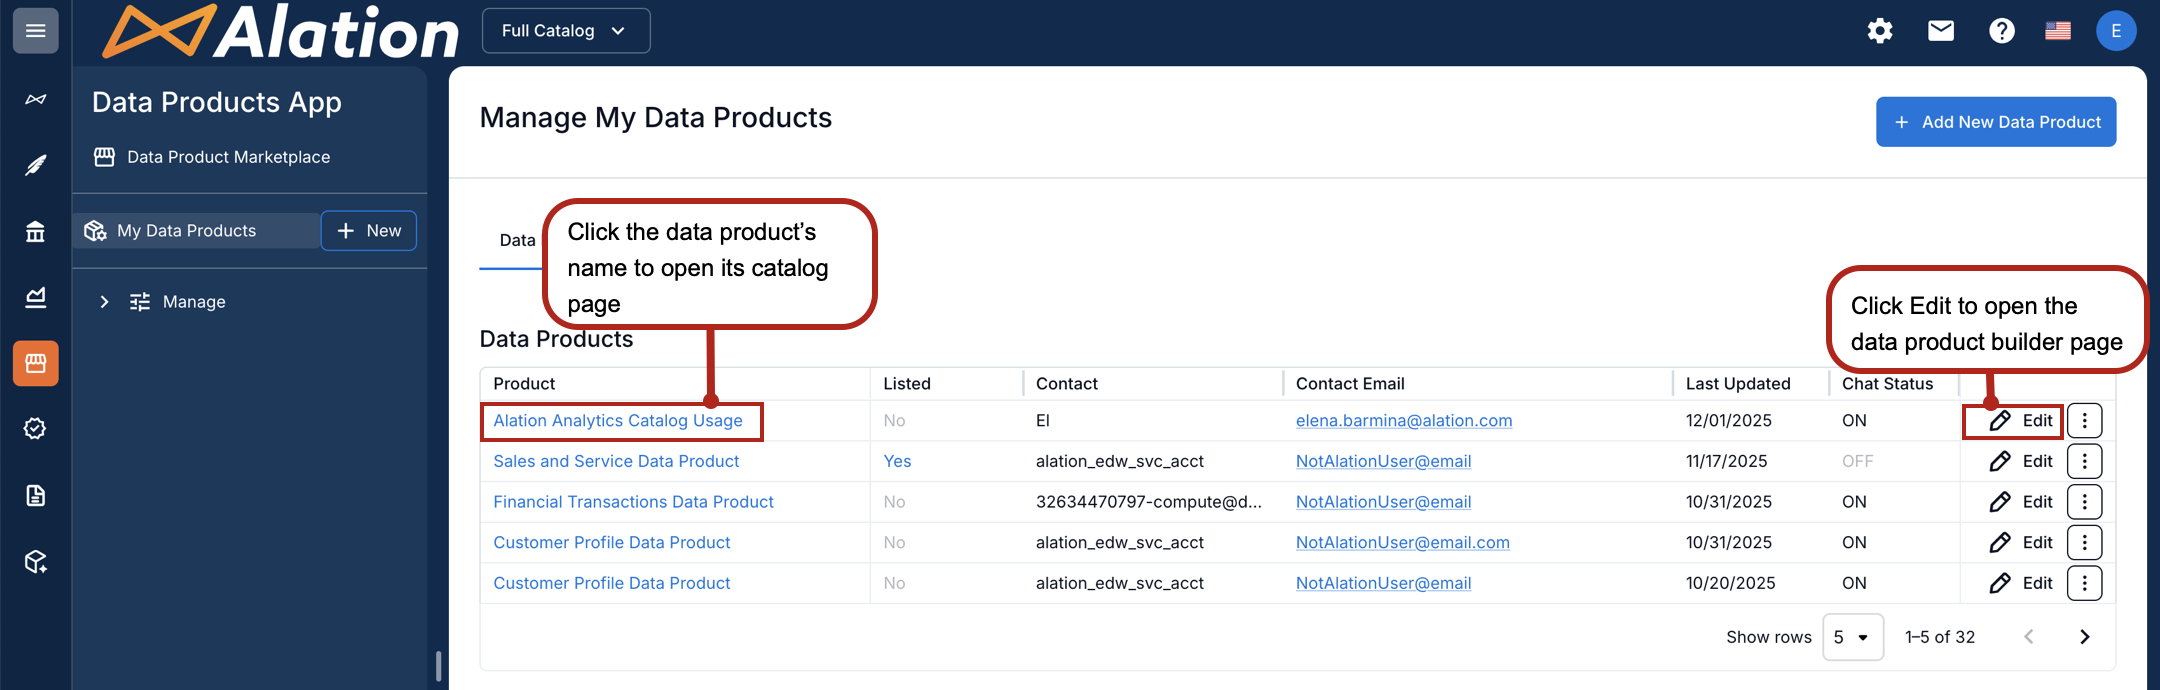
From the Data Products table, click the Edit icon. You are taken to the data product builder page. On the right side of the page, select the Configure tab.
From the Data Products table, click the data product name. The catalog page of the data product opens. Click the three-dot menu on the top right and select Configure Chat.
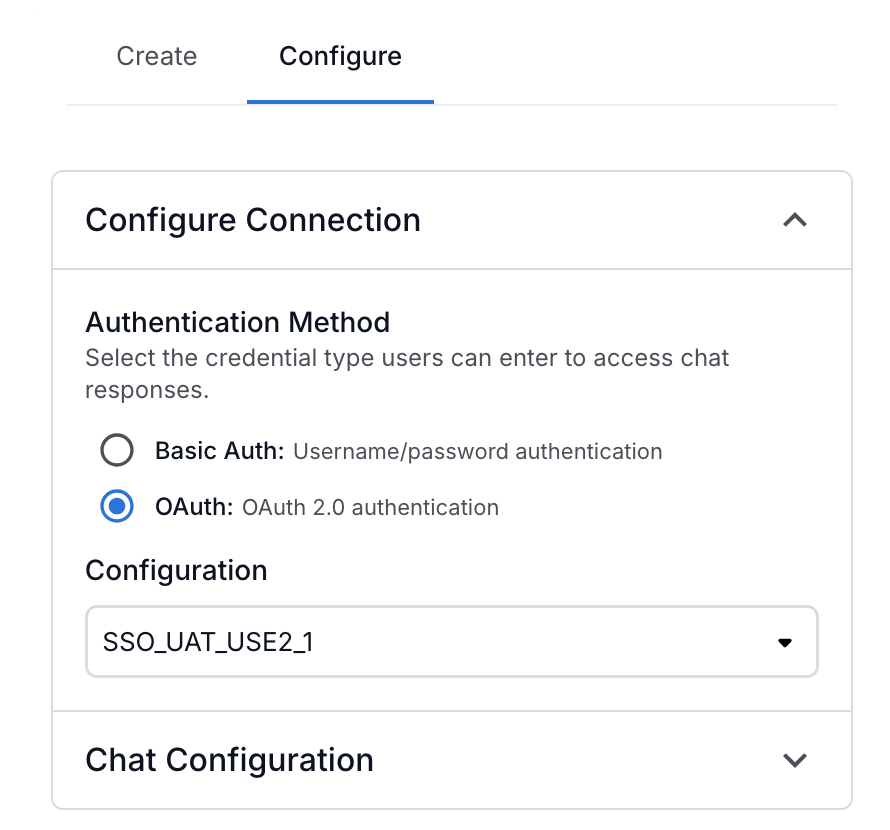
Under Configure, expand Configure Connection.

Select OAuth.
From the list of available authentication profiles, select the one you created for this configuration.
On the top right of the data product builder, click Save.
Authenticate via Chat
Once the authentication configuration is complete:
Navigate to Data Products App from the left-side navigation.
Select My Data Products.
Click a data product’s name to open it. Click on View Product Details to open the product details page.
Click the Chat button on the bottom of the page.
Select Continue with SSO.
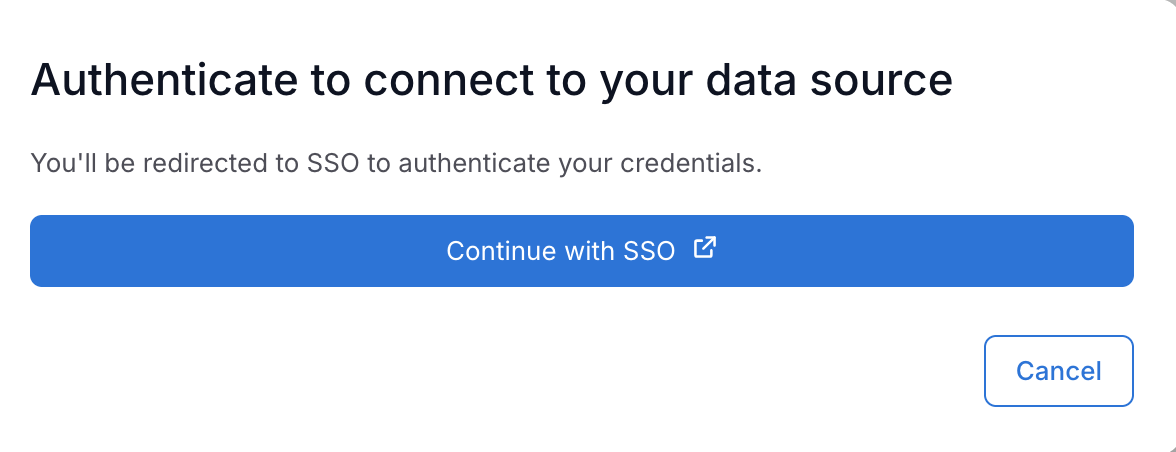
The Google sign-in page appears. Enter your Google account credentials to complete the authentication.
After successful authentication, the Chat is ready for you to ask questions about the dataset.
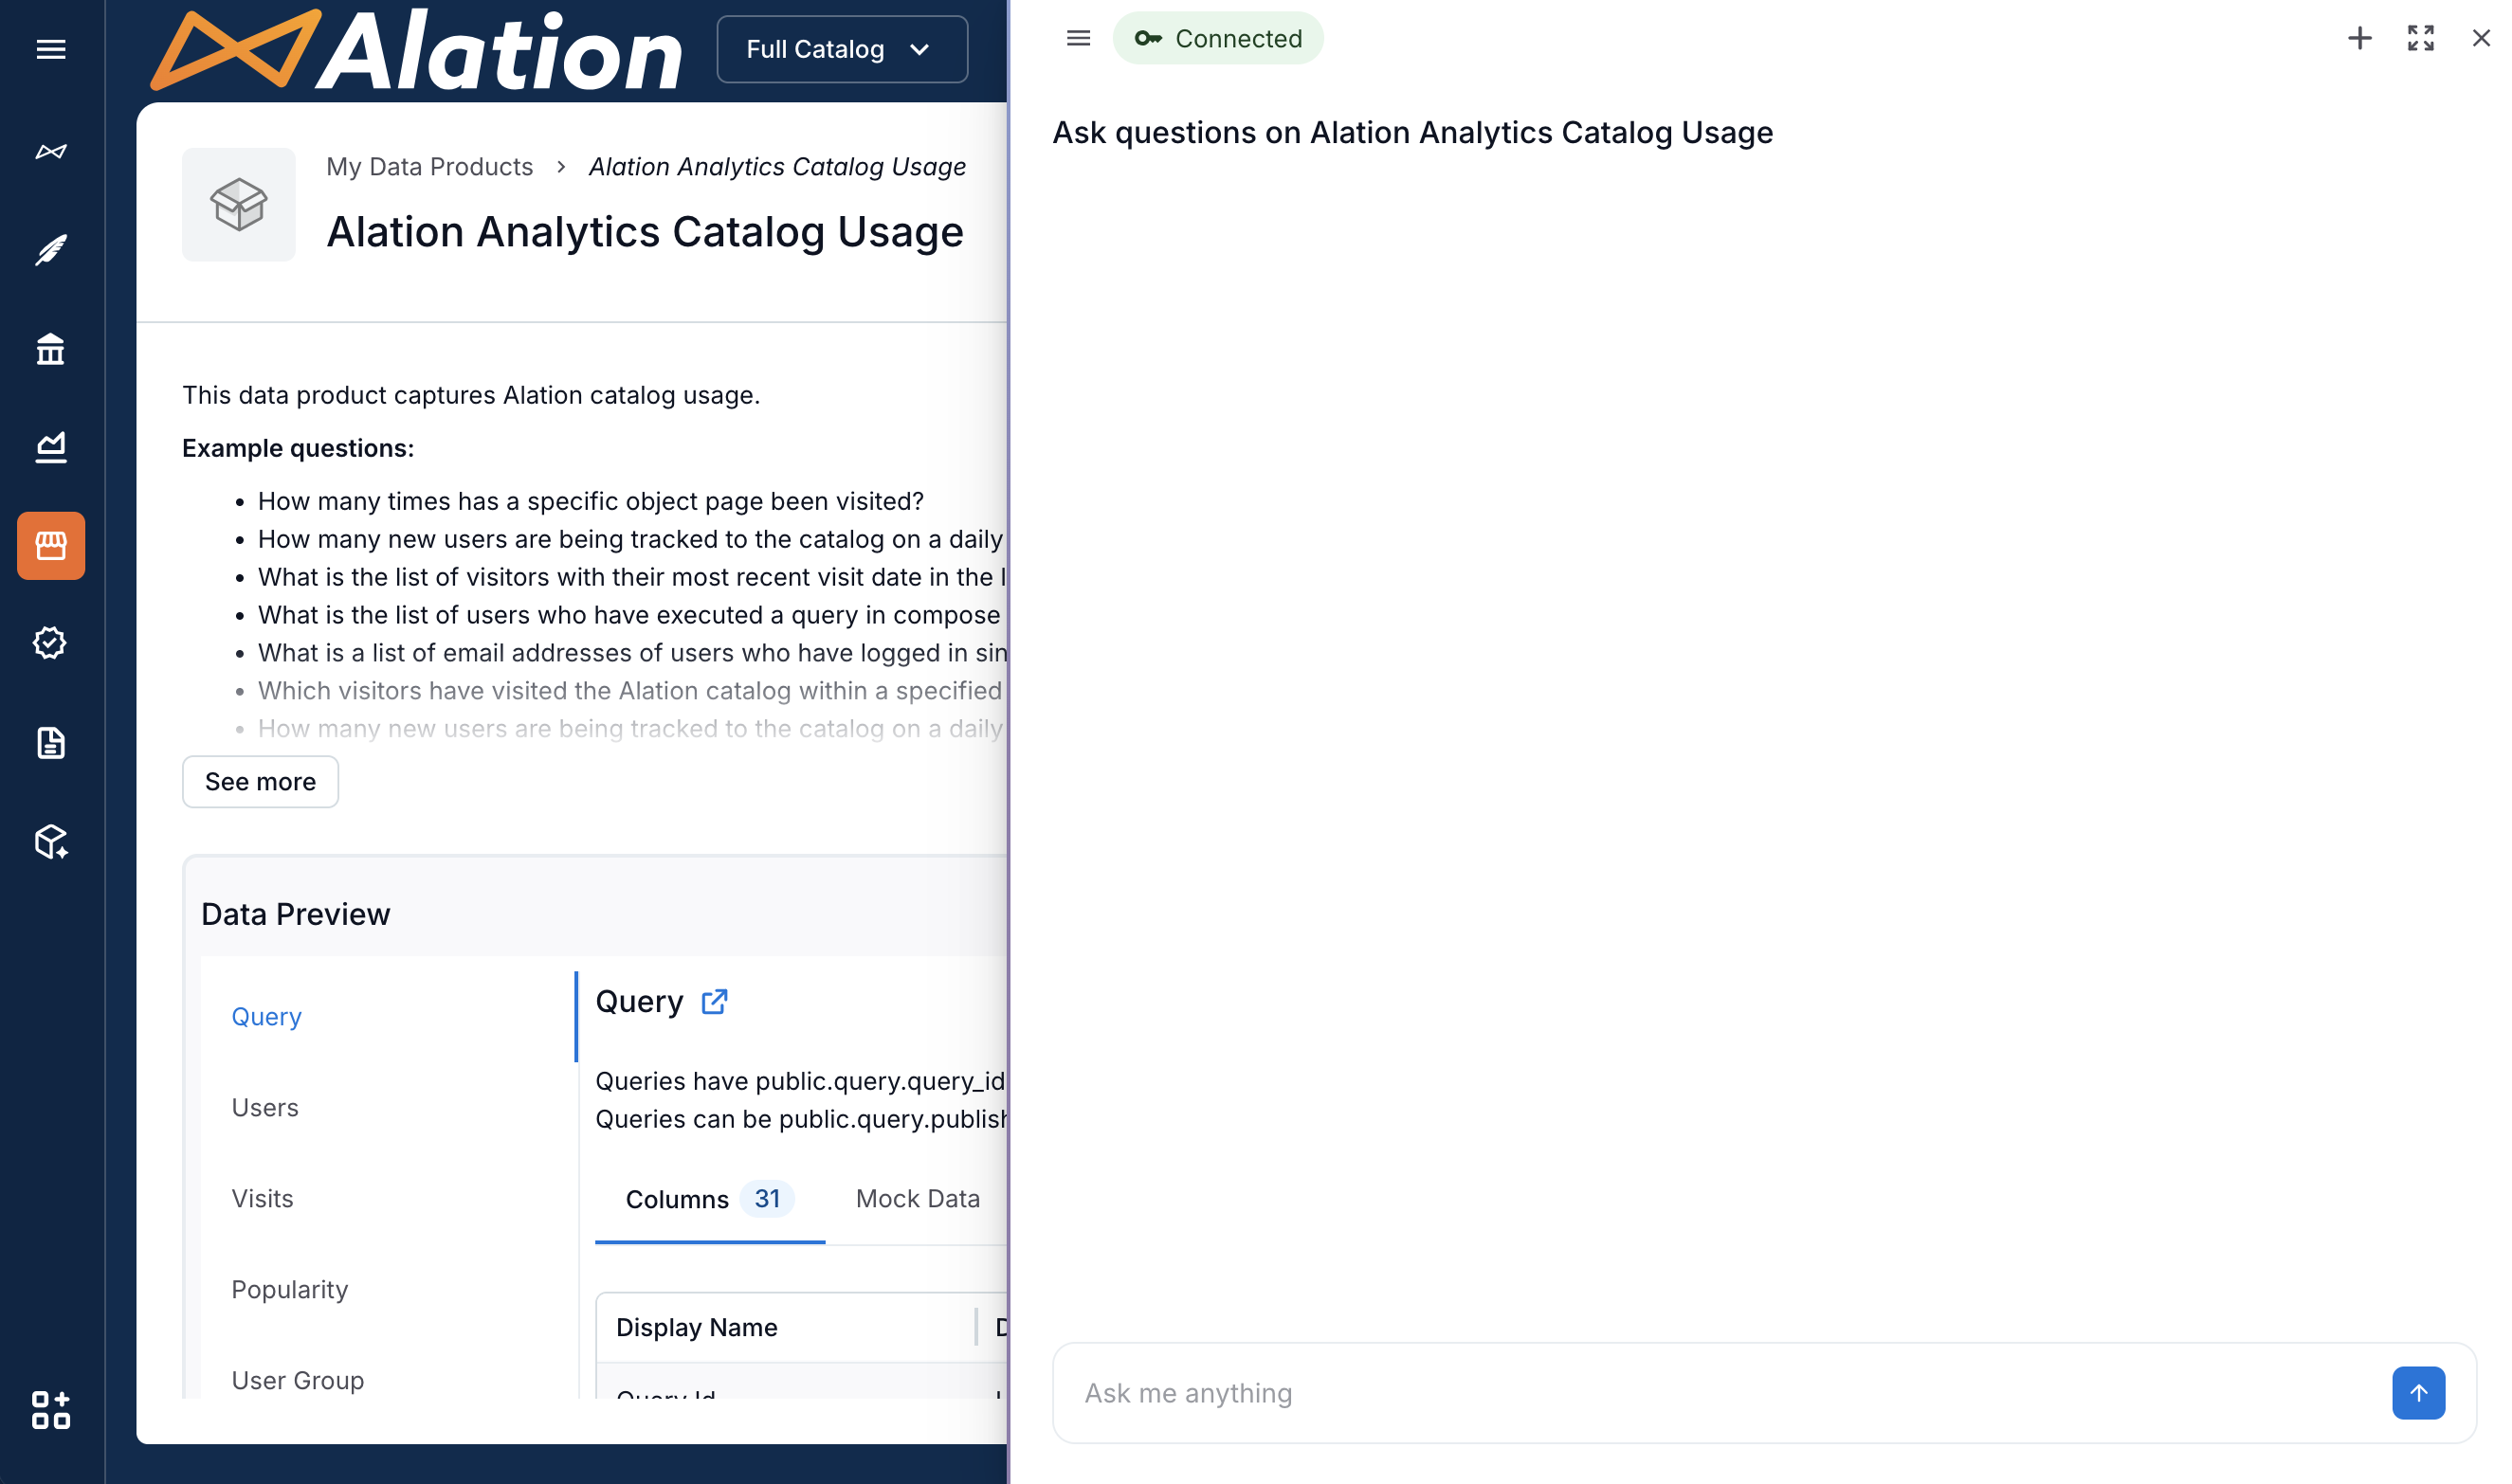
Type your question at the bottom of the panel and click the Send icon. The screenshot below shows a connected Chat that is ready for user input.